Customize Footer
Customizing Footer; This section that will be attached to every page of the website. It is located at the bottom of the website. It is the section that shows contact information, including address and telephone number. Social channels or other additional menus. The methods for customizing the lower menu format are divided into 4 topics as follows.
- How to add Footer Menu
- How to set Layout
- How to set up Design
- How to set Footer Background
1. How to add a footer menu. When you click on Footer Menu, you will find the Manage section where you can set the menu name Template to choose the display format and the Custom Design section to adjust the color and text of the bottom menu. The method is as follows.
2. Click on the button “Manage”
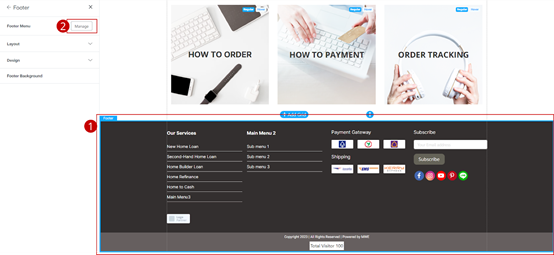
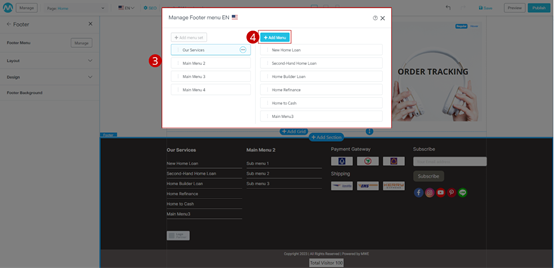
3. Modal display system to manage footer menu
4. Click the button “Add Menu”
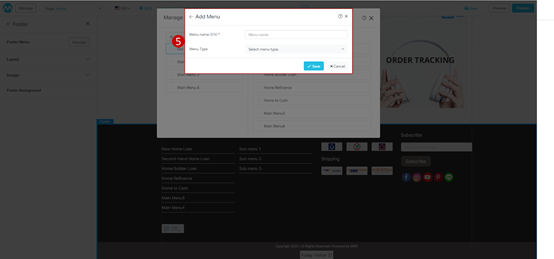
5. Modal display system “Add Menu” Users can define the name of the submenu and choose the type of menu you want.
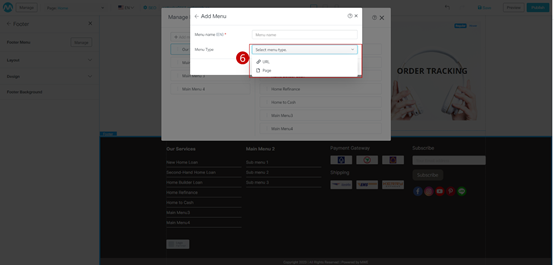
6. Click on the option Dropdown. The system will display 2 options:
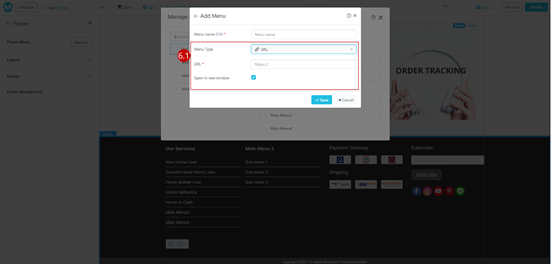
- URL : Used if the menu is an internal website. Click and the menu will go outside.
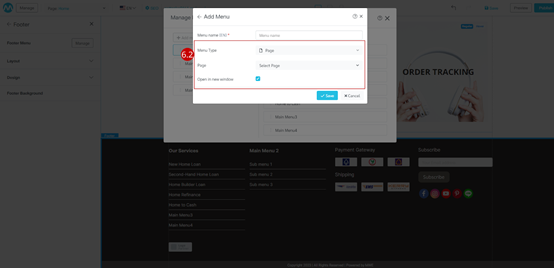
- Page : If the menu has content, images, either custom design or product system, this is the menu, and we have to create it on the homepage menu first, and when we create it, it gives you options.
6.1 If the menu type is selected as a link (URL), the system will require you to fill in the information as shown in the picture.
6.2 In the case of selecting the menu type as Page, the system will require you to fill in information as shown in the picture.
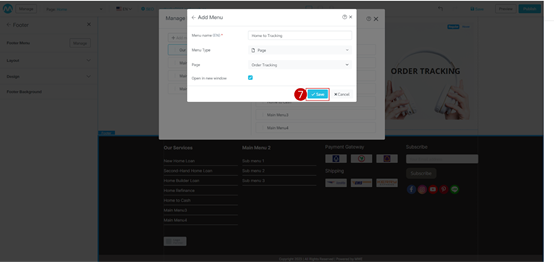
7. Click on the button “Save”
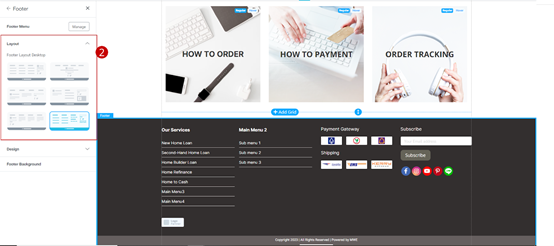
2.The Layout menu sets the display of the Footer menu, where the user can select a total of six display modes, when the system selects to change the automatic display, each of which has a different part of the design. The 3rd mode can turn on/off different settings.
1. Click “Footer”
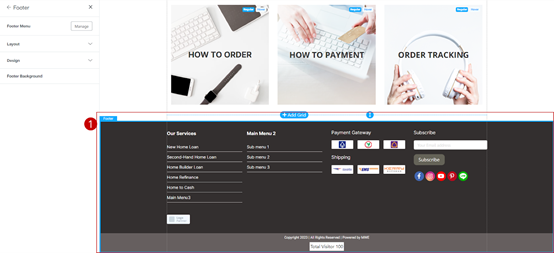
2. Go to “Layout” and select according to your needs
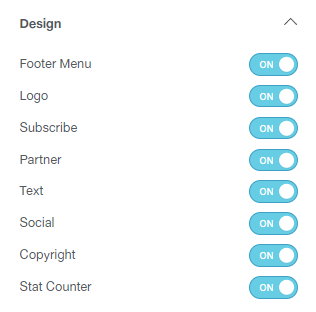
3. Design Click on the Footer > Design tab. Users can enable/disable The display of various information on the Footer is possible. The settings here will depend on the user’s choice of format in “Item 2” The display settings for each format are as follows.
Settings for formats 1 and 2
- Footer Menu
- Logo
- Subscribe
- Partner
- Text
- Social media
- Copyright
- Stat Counter
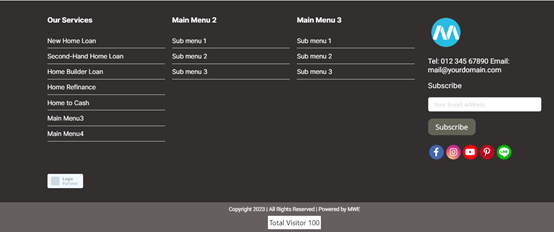
Example of displaying the Footer format 1
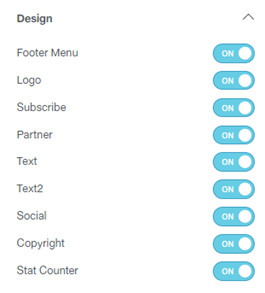
3rd Pattern Settings The system will be available to enable/disable. Total of 2 message boxes as follows
- Footer Menu
- Logo
- Subscribe
- Partner
- Text box 1
- Text box 2
- Social media
- Copyright
- Stat Counter
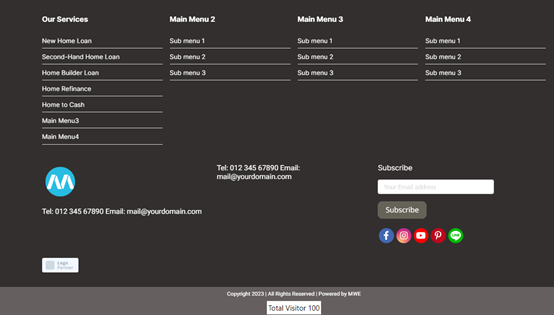
Example of display of bottom menu (Footer) format 3
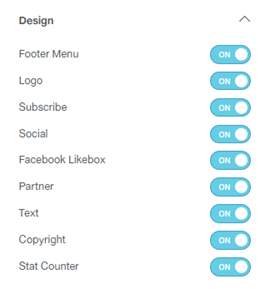
In the 4th format setting, the system will allow you to turn on/off Facebook Likebox.
- Footer Menu
- Logo
- Subscribe
- Social media
- Facebook Likebox
- Partner
- Text box 1
- Copyright
- Stat Counter
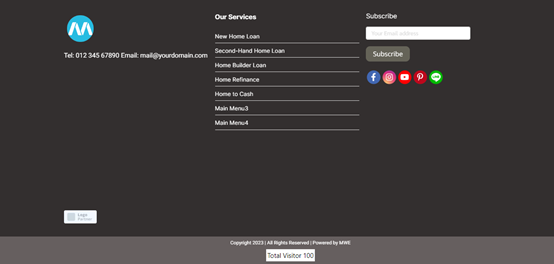
An example of displaying the bottom menu (Footer), format 4
The 5th format setting will be available to enable/disable the system. Total 4 message boxes
- Footer Menu
- Logo
- Subscribe
- Social media
- Text box 1
- Text box 2
- Text box 3
- Text box 4
- Partner
- Copyright
- Stat Counter
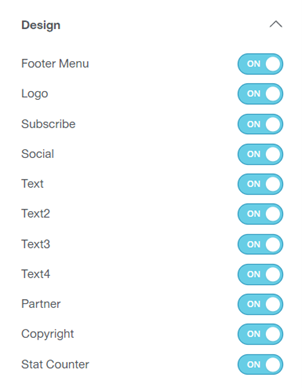
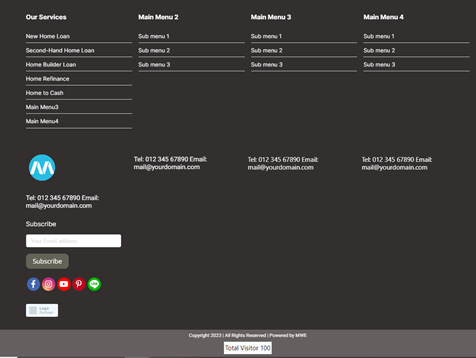
Example of display of bottom menu (Footer) format 5
Format Setting 6 The system will be available to turn on/off. Payment channels, shipping carriers, and tags are as follows.
- Footer Menu
- Payment channels
- Shipping carriers
- Subscribe
- Social media
- Tags
- Partner
- Copyright
- Stat Counter
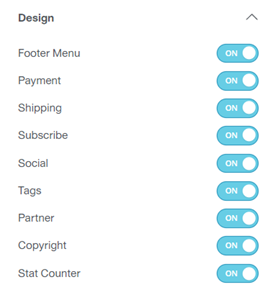
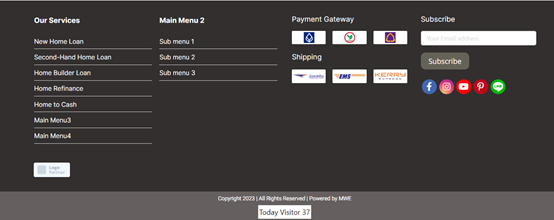
An example of displaying the Footer format 6
4. Footer Background
- Click on “Footer”
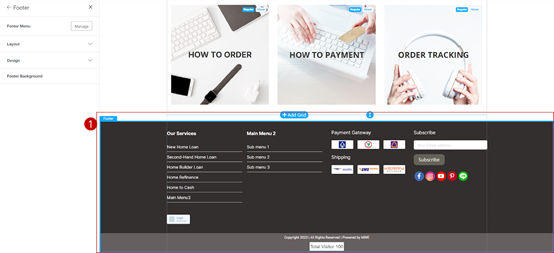
2. Go to “Footer Background”
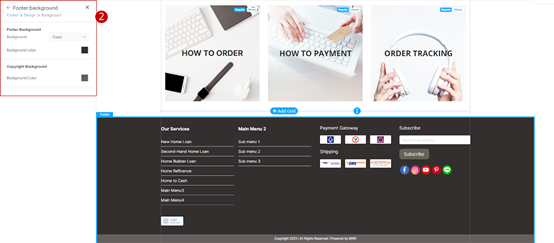
3. Click the “Background” option. The system will display 4 format options as follows
- Transparent is based on the website’s background.
- Color can be customized as desired.
- Gradient can adjust the color from dark to light. and can adjust the gradient position
- Image scale, position, and color can be adjusted.
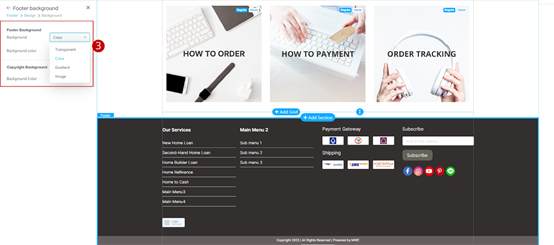
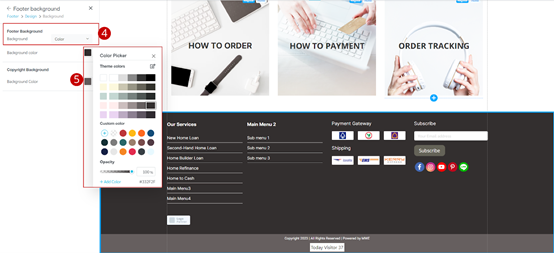
- Example select background style as “Color”
- Click on “Color Box” to select the desired background color
